SE7 ongoing project
SE7 ongoing project
This is my SE7. I bought it back in 2009 from ebay for just under £300 as spares/repair.
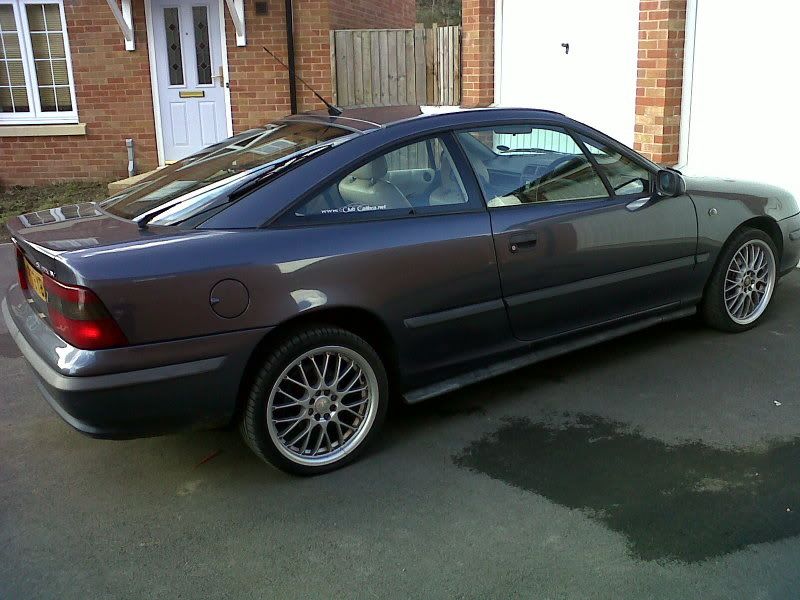
It's not been a great car and there are many, many things wrong that need to be put right and its' generally quite tatty.
It's coming up to MOT time again and I was at a point where I had to make a decision.. scrap it, or spend the time and effort to bring her back to a decent standard.
I've decided this SE7 is not ready for the scrappy and will live on!
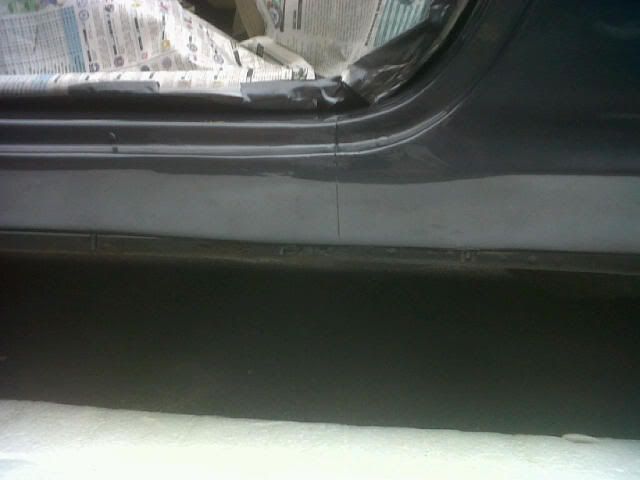
The first issue to sort out is the large hole thats rusted through on the passenger sill.
I'd made a bodge repair last summer with a load of filler and grey primer, which not just looked nasty but was rusting out.
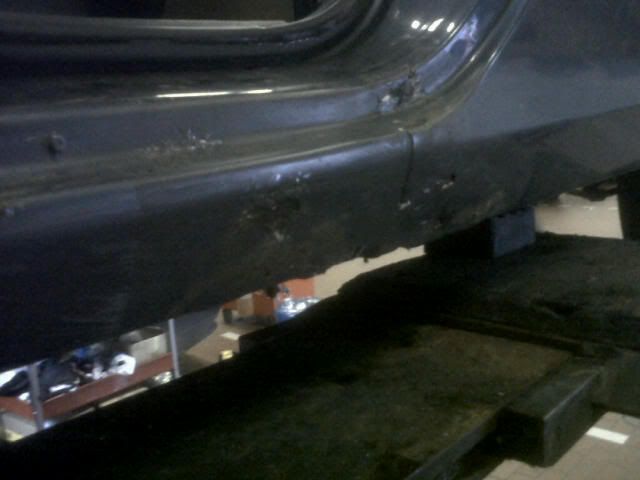
A mate at work said he'd weld a couple of patches on it for me, so we ground off the filler and covered the patches with kurust.

The patch of filler at the join of the qtr panel covers a hole that had rotted away, exposing the inner panel.
We welded on a copule of plates, then covered them with seam sealer. I would have liked to have the patches cut and fitted flush but hey, it was a favour!
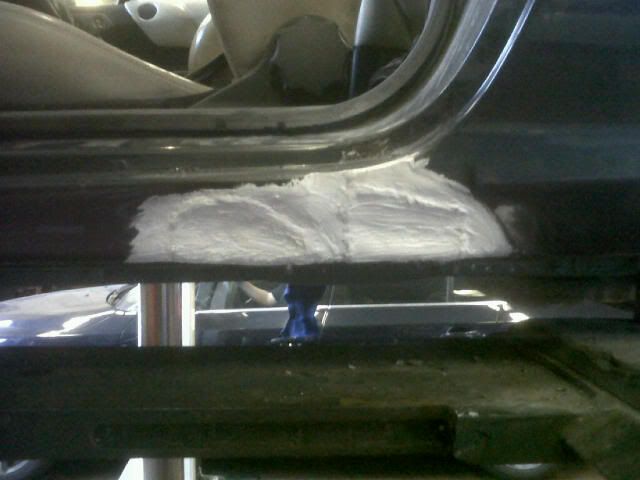
There was a few more scabby bits on there so sanded them down and coated with kurust.
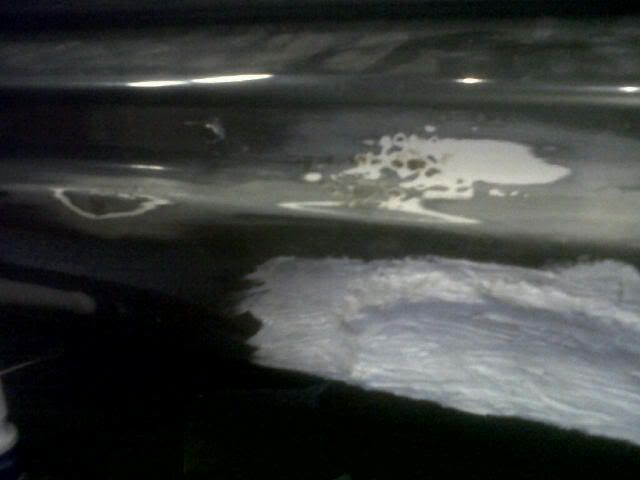
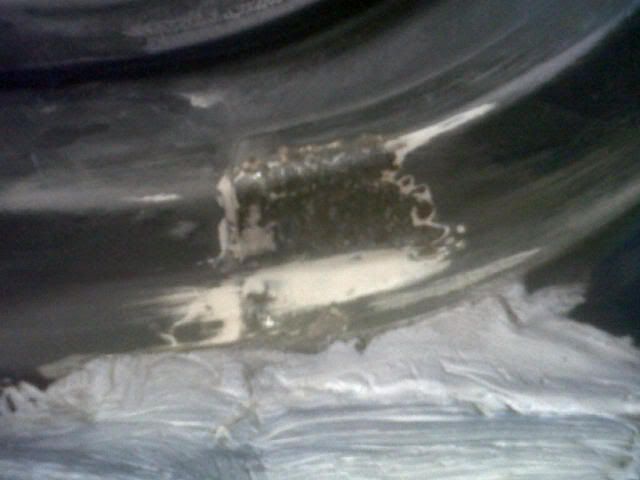
It's taken all day for the sealer to dry so not been able to fill the patches, that's tomorrows job.
It's not been a great car and there are many, many things wrong that need to be put right and its' generally quite tatty.
It's coming up to MOT time again and I was at a point where I had to make a decision.. scrap it, or spend the time and effort to bring her back to a decent standard.
I've decided this SE7 is not ready for the scrappy and will live on!
The first issue to sort out is the large hole thats rusted through on the passenger sill.
I'd made a bodge repair last summer with a load of filler and grey primer, which not just looked nasty but was rusting out.
A mate at work said he'd weld a couple of patches on it for me, so we ground off the filler and covered the patches with kurust.
The patch of filler at the join of the qtr panel covers a hole that had rotted away, exposing the inner panel.
We welded on a copule of plates, then covered them with seam sealer. I would have liked to have the patches cut and fitted flush but hey, it was a favour!
There was a few more scabby bits on there so sanded them down and coated with kurust.
It's taken all day for the sealer to dry so not been able to fill the patches, that's tomorrows job.
-
MarkSE7
Re: SE7 ongoing project
Oh now that was a bit of a mess.
Mark...........It's Red........It's a V6............It's an SE9!..............and She's bad.
Mark1@clubcalibra.net
ClubCalibra Best Presented 2006
ClubCalibra Best Presented 2010
ClubCalibra Best Interior 2011
My Garage
Mark1@clubcalibra.net
ClubCalibra Best Presented 2006
ClubCalibra Best Presented 2010
ClubCalibra Best Interior 2011
My Garage
-

- Gold Member

- Posts: 3136
- Joined: Sat Jan 10, 2004 1:00 pm
- Location: Surrey, England
Re: SE7 ongoing project
Nice to see it on the road to recovery
Nothing succeeds like a budgie with nae teeth
Up the Hibs!!
Now with added Vectra VXR power
Now calibraless
Up the Hibs!!
Now with added Vectra VXR power
Now calibraless
-

- ClubCalibra.net

- Posts: 1320
- Joined: Thu Apr 08, 2004 8:55 pm
- Location: Luton
Re: SE7 ongoing project
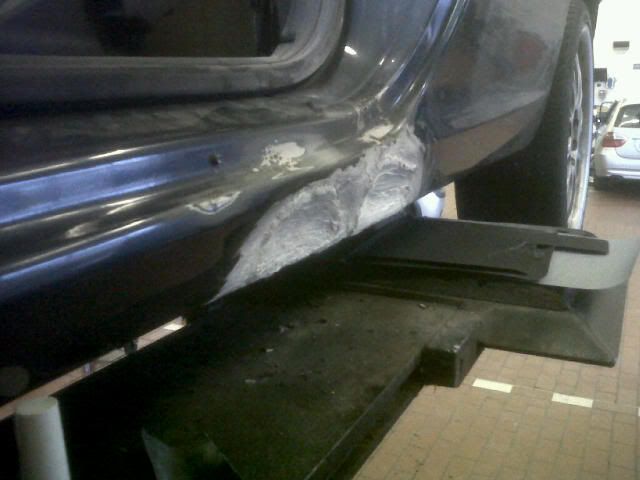
I had to finish this off today, so got out first thing this morning despite the strong wind.
A little bit of filler and a load of sanding later, I reshaped the filler to the original panel and made the panel seam out of filler.
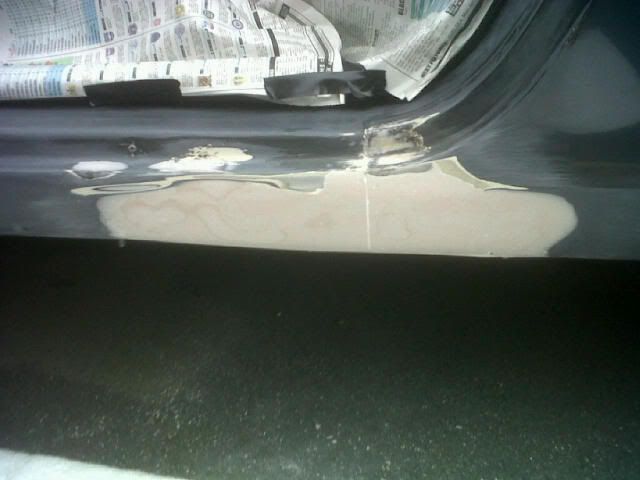
Then a couple of coats of primer and a can of magic grey paint.
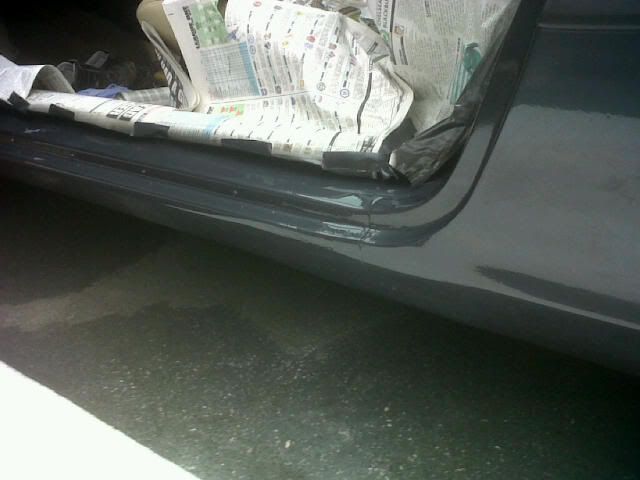
Not too bad really considering I was rushing and battling with the weather, a couple of patches could have done with a bit more smoothing off but its fine. I'd be getting the car resprayed one day anyway.
A little bit of filler and a load of sanding later, I reshaped the filler to the original panel and made the panel seam out of filler.
Then a couple of coats of primer and a can of magic grey paint.
Not too bad really considering I was rushing and battling with the weather, a couple of patches could have done with a bit more smoothing off but its fine. I'd be getting the car resprayed one day anyway.
-
MarkSE7
Re: SE7 ongoing project
that looks ok, good to see an other cally being saved not many se7's around
steve
Chairman
The Drain
LE 4x4 turbo
SE2 4x4 turbo RIP
Chairman
The Drain
LE 4x4 turbo
SE2 4x4 turbo RIP
-

- ClubCalibra.net

- Posts: 7178
- Joined: Wed Jan 03, 2007 6:58 pm
- Location: lanarkshire
Re: SE7 ongoing project
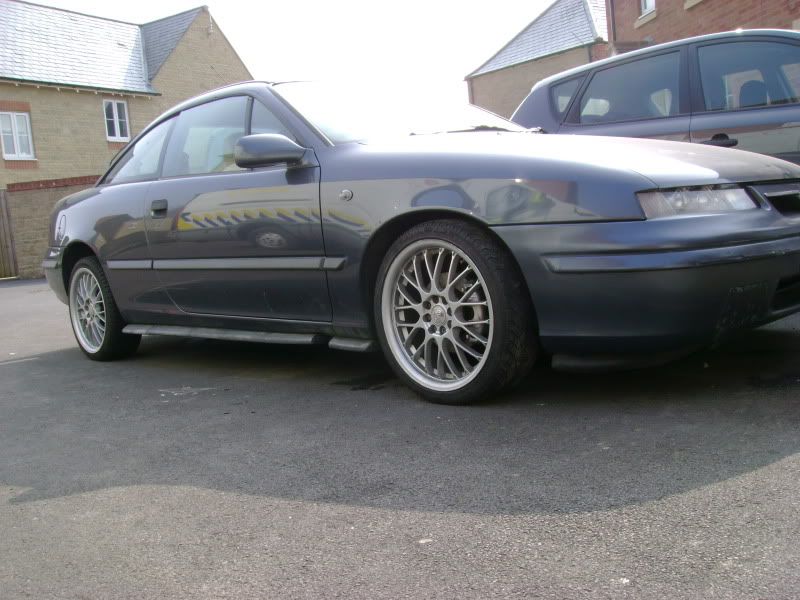
im liking the alloys, my se7 could do with them
as im not to keen on the standard wheels
rob
as im not to keen on the standard wheels
rob
-
vcab1
Re: SE7 ongoing project
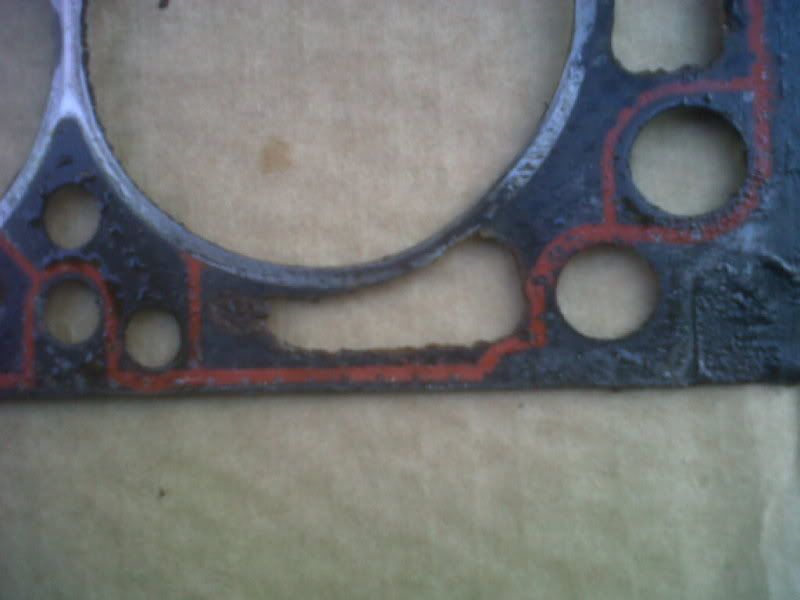
Not had much chance to do anything with the car lately, but here's the engine bay after today's work.

And the offending gasket.. this, along with a leaky rad, was causing coolant loss, pressurising the system and rough running.
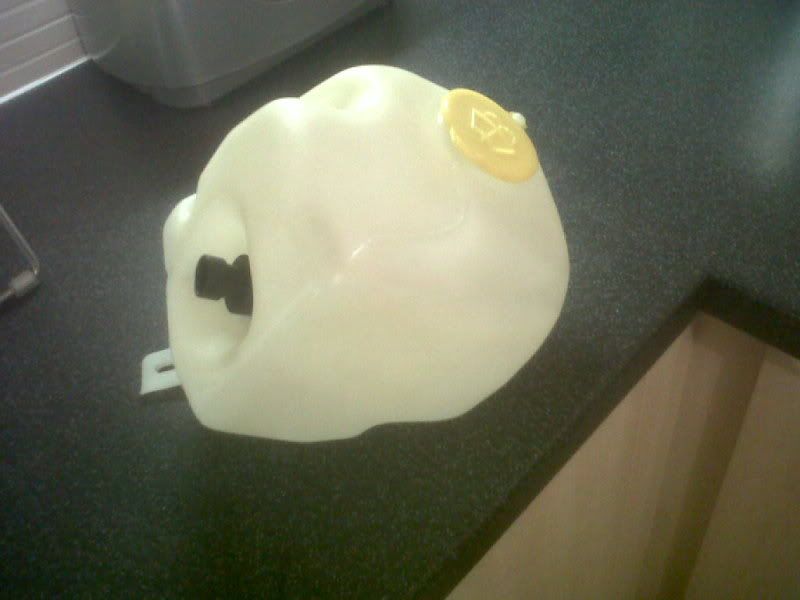
Also cleaned up these during the week, the header tank is still quite yellow after an overnight soak in bleach.
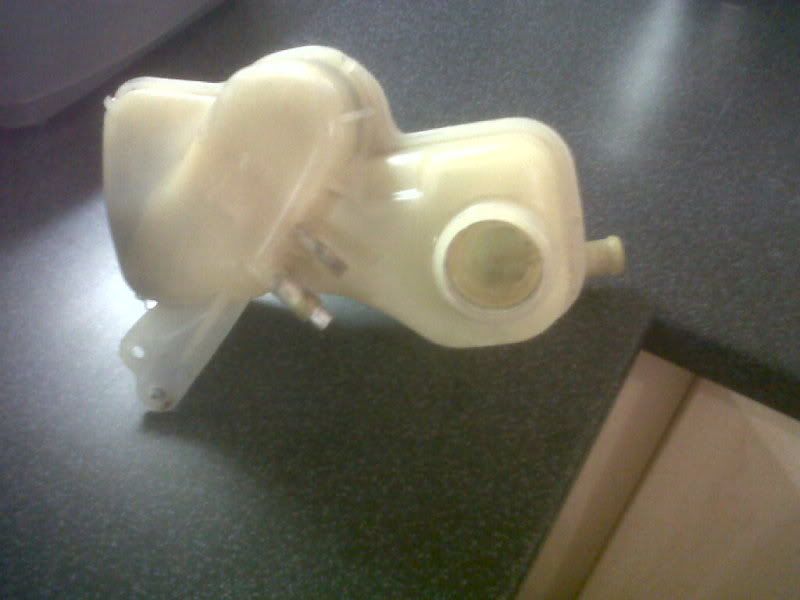
I've also taken out the heater matrix as I've never had hot air in the car. The inlet channels were blocked with lumps of crust from the engine so have been trying to flush it through with all sorts, including coca cola. It's getting there and hopefully will be far more efficient than before.
More to come...
And the offending gasket.. this, along with a leaky rad, was causing coolant loss, pressurising the system and rough running.
Also cleaned up these during the week, the header tank is still quite yellow after an overnight soak in bleach.
I've also taken out the heater matrix as I've never had hot air in the car. The inlet channels were blocked with lumps of crust from the engine so have been trying to flush it through with all sorts, including coca cola. It's getting there and hopefully will be far more efficient than before.
More to come...
-
MarkSE7
Re: SE7 ongoing project
Nice progress 
I dont think you'll ever get the yellowness out of the header tank....I tried years ago on my Belmont when the HG went, and it's ingrained.
I dont think you'll ever get the yellowness out of the header tank....I tried years ago on my Belmont when the HG went, and it's ingrained.
-

- ClubCalibra.net

- Posts: 847
- Joined: Fri Mar 12, 2004 1:00 pm
- Location: South Cumbria
Re: SE7 ongoing project
Took the head into work and stripped it bare and gave it it's first bath.

Going to take the head to be skimmed towards the end of the month then give it a good cleanup and maybe a bit of port/polish.
Valves look like they've been in for all 140k miles... the white residue on the left is from coolant burning in the cylinder.
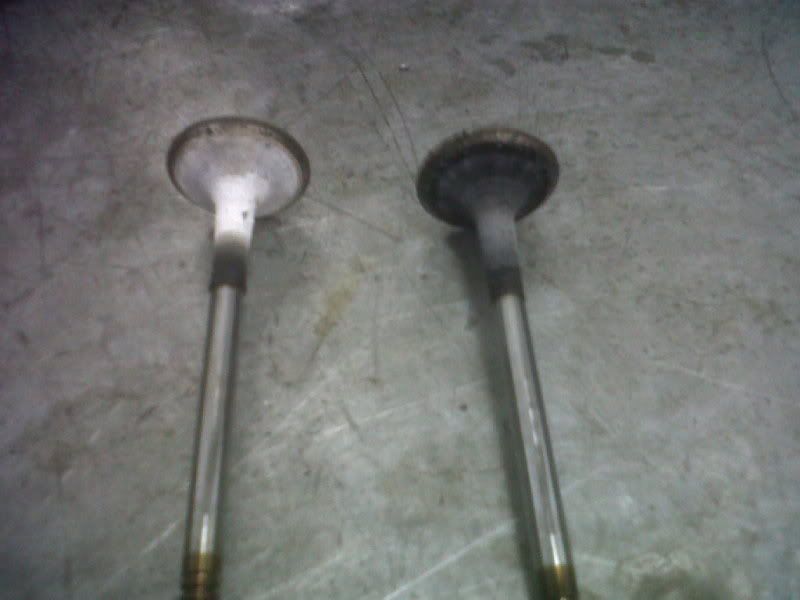
These have now all been cleaned up on the wire wheel and waiting to go back in.
Also picked this up at the weekend for 50 quid. Complete stainless Scorpion system with decat pipe.
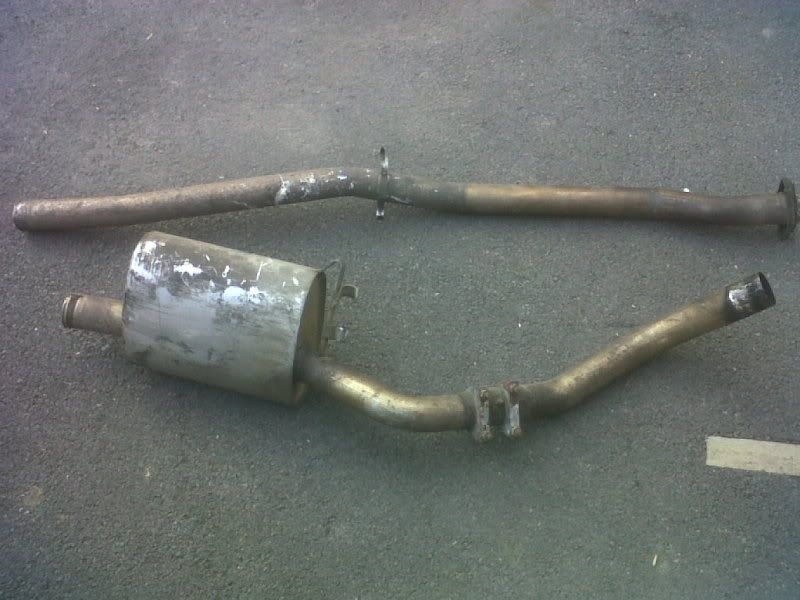
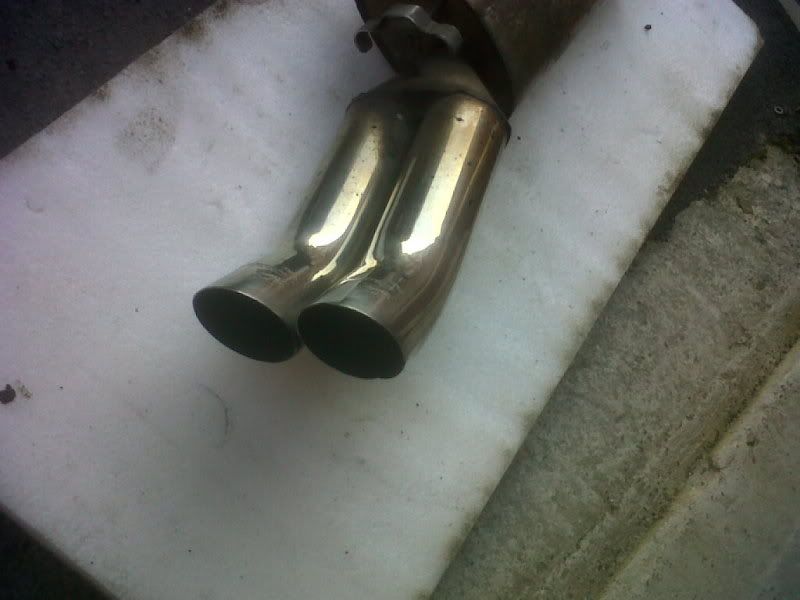
Not sure on the 'DTM' style pipes, would prefer the twin square style, but it's far better than the current rotten kwik fit peashooter!
All needs a good cleanup before fitting.
Going to take the head to be skimmed towards the end of the month then give it a good cleanup and maybe a bit of port/polish.
Valves look like they've been in for all 140k miles... the white residue on the left is from coolant burning in the cylinder.
These have now all been cleaned up on the wire wheel and waiting to go back in.
Also picked this up at the weekend for 50 quid. Complete stainless Scorpion system with decat pipe.
Not sure on the 'DTM' style pipes, would prefer the twin square style, but it's far better than the current rotten kwik fit peashooter!
All needs a good cleanup before fitting.
-
MarkSE7
Re: SE7 ongoing project
That exhaust is for an XE 16v not the XEV 16v as the hangers are different.....but, i dare say local Powerflow dealer will be able to make a bracket etc to make it fit, plus they should be able to chop the tails off and fit the twin squares that you want.
-
- ClubCalibra.net
- Posts: 847
- Joined: Fri Mar 12, 2004 1:00 pm
- Location: South Cumbria
Re: SE7 ongoing project
Well spotted! Although the guy did assure me it was from the eco. 
Its just the rear box hangers but I can get that sorted with some different rubber hangers that mount through 90deg. Will fit it and see if i can live with it before chopping it off.
Its just the rear box hangers but I can get that sorted with some different rubber hangers that mount through 90deg. Will fit it and see if i can live with it before chopping it off.
-
MarkSE7
Re: SE7 ongoing project
A little progress, stripped down the front suspension for a refurb.
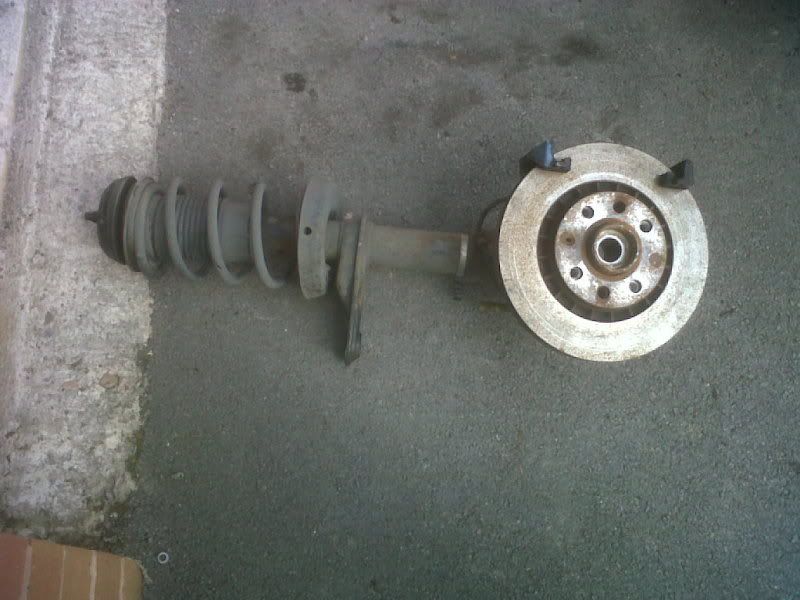
A good clean up and paint..
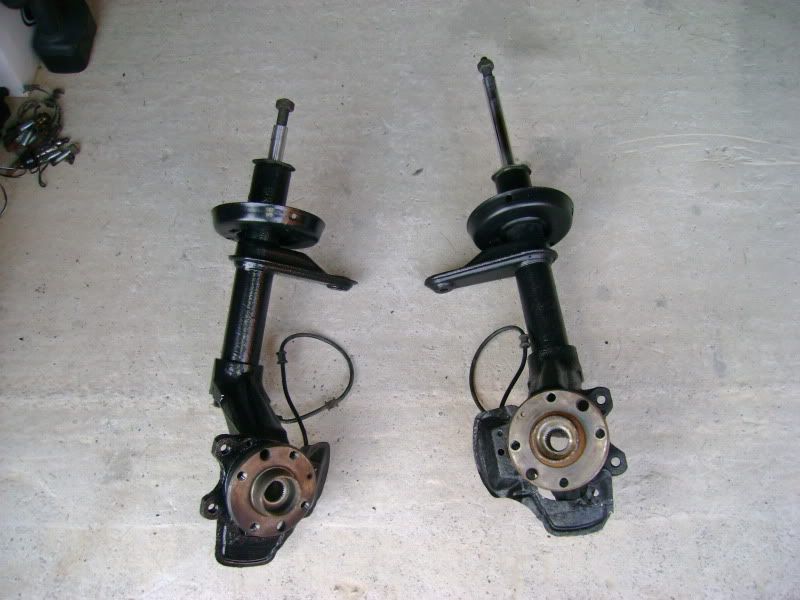
The LH shock is knackered and both top mount bearings were badly worn and all are being replaced next week.
A new pair of lower arms and both track rod ends fitted..
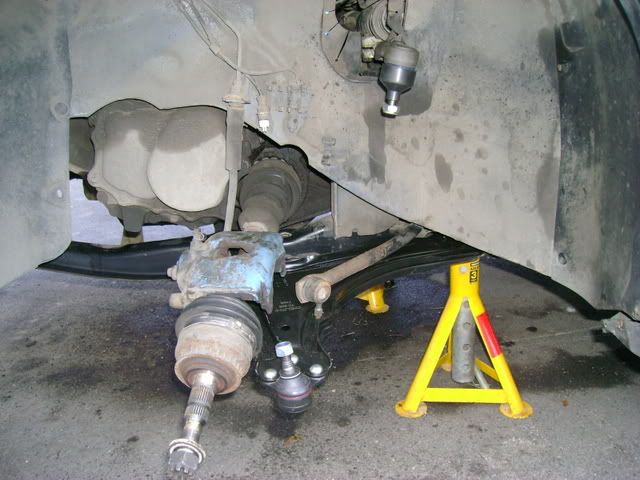
I'll give it a good cleanup under the wheelarch and paint the scabby calipers before refitting the suspension. Hopefully she'll drive like new!
A good clean up and paint..
The LH shock is knackered and both top mount bearings were badly worn and all are being replaced next week.
A new pair of lower arms and both track rod ends fitted..
I'll give it a good cleanup under the wheelarch and paint the scabby calipers before refitting the suspension. Hopefully she'll drive like new!
-
MarkSE7
Re: SE7 ongoing project
This Sunday, I finished off the front suspension refurb...
Freshly painted caliper brackets, new top bearings new dampers and lowering springs.
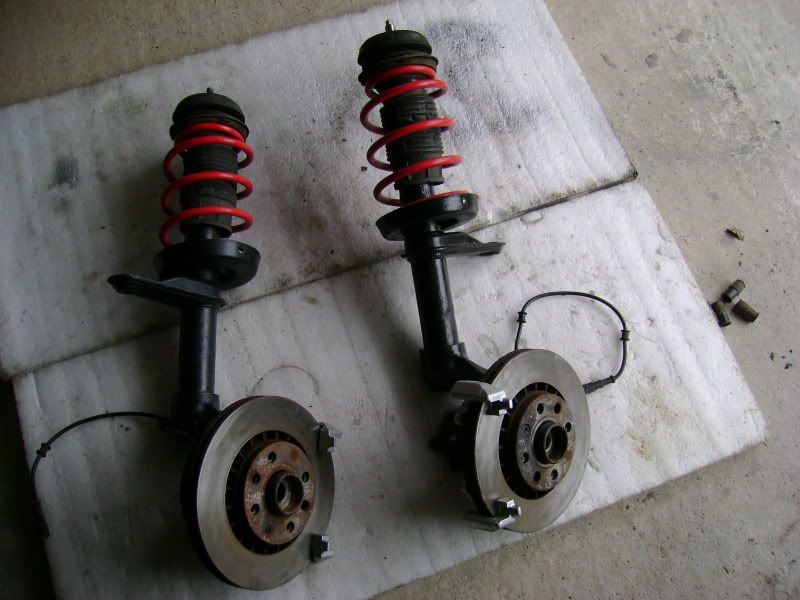
Refitted with repainted calipers, new lower arms, new track rod ends and ARB links are only 6mths old.
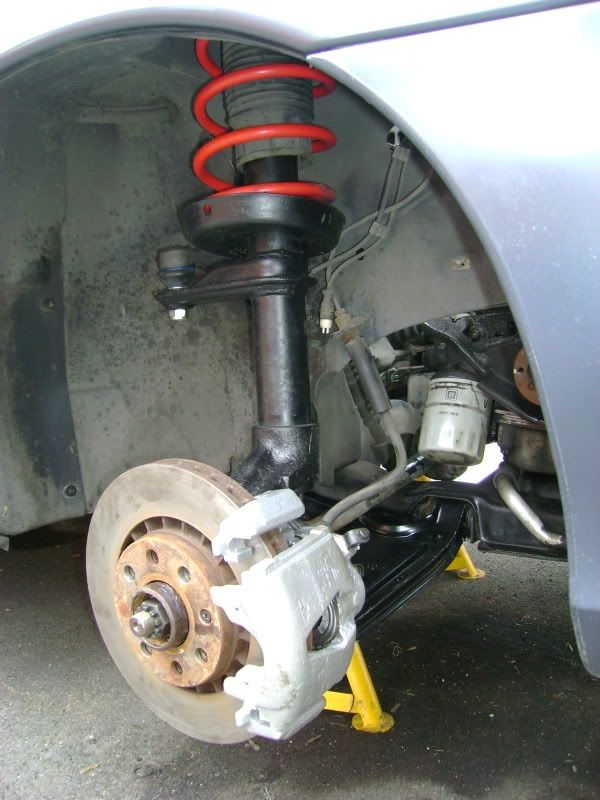
Front finished..
Freshly painted caliper brackets, new top bearings new dampers and lowering springs.
Refitted with repainted calipers, new lower arms, new track rod ends and ARB links are only 6mths old.
Front finished..
-
MarkSE7
Re: SE7 ongoing project
Good progress. I like the look of the painted calipers (silver?) behind those wheels 
-
Adrian
Who is online
Users browsing this forum: No registered users and 15 guests